

Wait! Don’t Go Yet! 👋
We see you eyeing those adorable outfits! 😍 Before you leave, here’s 10% OFF your first order!
Hurry, your little one’s next favorite outfit is waiting! 🛍️✨
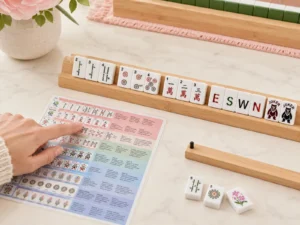
The American Mah Jongg card is a menu of winning hands. Your goal is to build one complete line exactly as printed—not a mixture of pieces from different lines. Use the current card issued for your group. Sections and examples change from year to year, so learn the card’s visual language instead of memorizing one season’s hands. Start with the Sections The card groups hands into families such as year hands, consecutive runs, odd or even numbers, winds and dragons, and singles and pairs. Section names help you scan, but the printed line—not the section title—controls the winning pattern. Read Each Line from Left to Right Spaces divide a line into groupings. A grouping may be a single, pair, Pung, Kong, Quint, or another pattern allowed by the card. Count all positions: a complete American Mah Jongg hand normally contains 14 tiles. Common shorthand includes: Parentheses contain instructions. Read them before choosing the hand; they may specify suit relationships, number choices, or which grouping varies. Colors Show Suit Relationships Printed colors do not automatically mean Craks, Bams, or Dots. They show how suits relate within that line: Dragons follow their matching suits under standard play: Red with Craks, Green with…
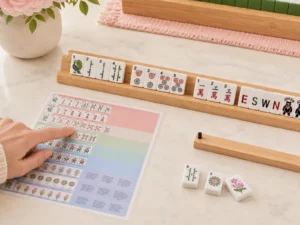
Choosing a hand is not a single decision made after the deal. It is a process of narrowing the card as your tiles change. Begin by reading the current card correctly. If its notation still feels unfamiliar, start with How to Read the American Mah Jongg Card. Step 1: Inventory the Hard-to-Rebuild Tiles Look first for assets that are difficult to replace: Do not count only how many tiles fit. A pair or rare natural tile may be more valuable than several unrelated singles. Step 2: Shortlist Card Sections Use what your rack already does well. Many odd numbers suggest scanning odd-number hands. Several consecutive tiles suggest run-based sections. Multiple Winds or Dragons justify checking those families. A dominant suit may favor a one-suit or suit-heavy option. Step 3: Keep Two Nearby Options Choose a primary hand and a backup that share several needed tiles. If both use your Flowers, pair, and main suit, Charleston passes and early draws can support either direction. Avoid selecting two hands with almost no overlap. That is not flexibility; it is two unrelated shopping lists. Step 4: Count Distance, Not Hope For each candidate, count the missing natural requirements, especially singles and pairs where…
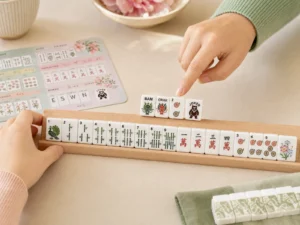
A dead hand is a hand that can no longer win under the governing rules. It is different from a weak hand: a weak hand is still legal and may improve; a dead hand has violated a requirement or become impossible. 1. An Exposure Fits No Possible Card Line Every exposed group must leave at least one legal line available. If your displayed groups cannot coexist in any one line on the current card, the hand may be declared dead. This is why you should identify a line before calling a tile, not after. 2. A Concealed Hand Was Exposed A line marked C must remain concealed during ordinary play. Calling and exposing a group for that line can invalidate the hand. The usual exception is calling the final discarded tile that completes Mah Jongg. Review Exposed vs. Concealed Hands. 3. A Joker Is Used Illegally A Joker cannot substitute for a required single or pair. It also cannot turn unrelated tiles into an identical group. Illegal use discovered in a hand or exposure may make the hand dead. See How to Use Jokers. 4. The Tile Count Is Wrong An incorrect number of tiles can trigger a dead-hand ruling.…
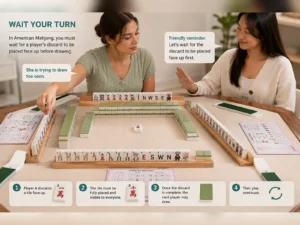
Mistakes are part of learning, but the same few errors cause most beginner confusion. Use this list as a pre-game refresher. 1. Passing a Joker Jokers cannot be passed during the Charleston. Keep them and review How to Use Jokers. 2. Choosing a Hand Too Early One attractive pair is not enough. Keep two overlapping possibilities until your rack and incoming tiles provide stronger evidence. Use the process in How to Choose a Hand. 3. Breaking a Pair Without Checking the Card Pairs are natural-only requirements and can be difficult to rebuild. Before passing or discarding one tile, scan for lines that use the pair. 4. Forgetting the Concealed Requirement A C hand cannot make ordinary exposures. Check X or C before every call; see Exposed vs. Concealed Hands. 5. Failing to Name a Discard Place the tile clearly and say its name. This helps all players recognize the discard and respond within the proper timing. 6. Using a Joker in a Single or Pair Jokers substitute only in eligible groups of three or more identical tiles. Required singles and pairs must be natural. 7. Calling a Tile for a Pair You normally cannot call a discard simply to form…
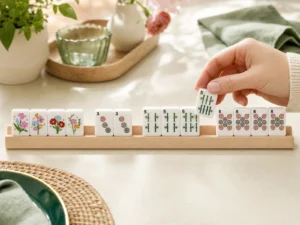
A well-organized rack reduces mental load. The goal is not a perfect display; it is a layout that helps you compare tiles with the card and change direction quickly. Start with Broad Families Group your concealed tiles loosely as: Within each numbered suit, arrange low to high. You can now see pairs, consecutive runs, gaps, odds, evens, and repeated numbers across suits. If tile names are still unfamiliar, review Get to Know the Tiles. Look for Pattern Signals After sorting, scan for: Use those signals to shortlist card lines with How to Choose a Hand. Reorganize as the Hand Changes Your first arrangement is temporary. After the Charleston and important draws, move your likely hand components closer together. Keep backup tiles nearby but distinct enough to compare. Do not preserve a tidy pattern after it stops helping. A useful rack changes as your plan changes. Avoid Broadcasting Your Hand Constantly separating exact groups, leaving dramatic gaps, or moving every incoming tile into one obvious position can reveal your direction. Vary your spacing, pause before rearranging, and do not point at the matching card line. You do not need to hide normal play, but you also do not need to provide…