
Wait—here’s 10% off.
Enjoy 10% off your first order with code WELCOME10.
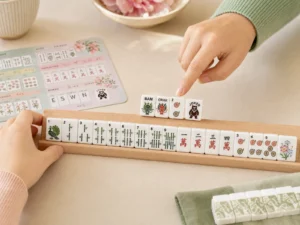
A dead hand is a hand that can no longer win under the governing rules. It is different from a weak hand: a weak hand is still legal and may improve; a dead hand has violated a requirement or become impossible. 1. An Exposure Fits No Possible Card Line Every exposed group must leave at least one legal line available. If your displayed groups cannot coexist in any one line on the current card, the hand may be declared dead. This is why you should identify a line before calling a tile, not after. 2. A Concealed Hand Was Exposed A line marked C must remain concealed during ordinary play. Calling and exposing a group for that line can invalidate the hand. The usual exception is calling the final discarded tile that completes Mah Jongg. Review Exposed vs. Concealed Hands. 3. A Joker Is Used Illegally A Joker cannot substitute for a required single or pair. It also cannot turn unrelated tiles into an identical group. Illegal use discovered in a hand or exposure may make the hand dead. See How to Use Jokers. 4. The Tile Count Is Wrong An incorrect number of tiles can trigger a dead-hand ruling.…

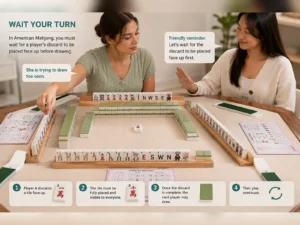
This walkthrough connects the full beginner course. Keep the current card beside your rack and use this sequence as a table-side guide. 1. Prepare the Table Confirm that the set contains the required tiles, Jokers, racks, dice, and any preferred accessories. Seat four players and choose East. Then shuffle, build the walls, and deal according to your table’s rules. East begins with 14 tiles; the others begin with 13. New to the equipment? Review Get to Know the Tiles and Set Up Your First Game. 2. Read the Rack, Then the Card Sort enough to see suits, pairs, Flowers, Winds, and Dragons. Scan likely card sections and shortlist two overlapping hands. Do not announce your target. Use How to Read the Card and How to Choose a Hand as references. 3. Complete the Charleston Pass tiles that help neither candidate while protecting pairs, rare natural requirements, and flexible combinations. Reevaluate after every pass. Your direction may change as useful tiles arrive. Follow the complete Charleston guide for pass order and optional stages. 4. Begin Normal Play East makes the first discard. Thereafter, a normal turn is: Play normally moves counterclockwise. Review How a Turn Works. 5. Decide Whether to Call Suppose another player discards…
Mistakes are part of learning, but the same few errors cause most beginner confusion. Use this list as a pre-game refresher. 1. Passing a Joker Jokers cannot be passed during the Charleston. Keep them and review How to Use Jokers. 2. Choosing a Hand Too Early One attractive pair is not enough. Keep two overlapping possibilities until your rack and incoming tiles provide stronger evidence. Use the process in How to Choose a Hand. 3. Breaking a Pair Without Checking the Card Pairs are natural-only requirements and can be difficult to rebuild. Before passing or discarding one tile, scan for lines that use the pair. 4. Forgetting the Concealed Requirement A C hand cannot make ordinary exposures. Check X or C before every call; see Exposed vs. Concealed Hands. 5. Failing to Name a Discard Place the tile clearly and say its name. This helps all players recognize the discard and respond within the proper timing. 6. Using a Joker in a Single or Pair Jokers substitute only in eligible groups of three or more identical tiles. Required singles and pairs must be natural. 7. Calling a Tile for a Pair You normally cannot call a discard simply to form…
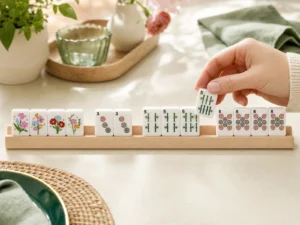
A well-organized rack reduces mental load. The goal is not a perfect display; it is a layout that helps you compare tiles with the card and change direction quickly. Start with Broad Families Group your concealed tiles loosely as: Within each numbered suit, arrange low to high. You can now see pairs, consecutive runs, gaps, odds, evens, and repeated numbers across suits. If tile names are still unfamiliar, review Get to Know the Tiles. Look for Pattern Signals After sorting, scan for: Use those signals to shortlist card lines with How to Choose a Hand. Reorganize as the Hand Changes Your first arrangement is temporary. After the Charleston and important draws, move your likely hand components closer together. Keep backup tiles nearby but distinct enough to compare. Do not preserve a tidy pattern after it stops helping. A useful rack changes as your plan changes. Avoid Broadcasting Your Hand Constantly separating exact groups, leaving dramatic gaps, or moving every incoming tile into one obvious position can reveal your direction. Vary your spacing, pause before rearranging, and do not point at the matching card line. You do not need to hide normal play, but you also do not need to provide…
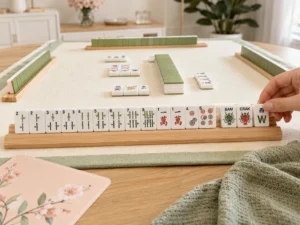
A strong discard is not simply a tile you dislike. It is the tile with the lowest value to your realistic hand options, after accounting for what the table has revealed. Keep Connected Tiles A tile is connected when it supports multiple parts of your plan. Strong connections include: Use How to Choose a Hand before rating individual tiles. Protect Natural Requirements Jokers cannot replace singles or pairs, so these positions deserve special attention. A natural pair may be worth protecting even when a loose number tile fits more visible places. Jokers themselves provide flexibility in groups of three or more. Review How to Use Jokers. Discard the Least Connected Tile Early in the game, good discard candidates often include isolated tiles that fit neither shortlisted hand, weak off-suit numbers, or special tiles unsupported by your rack. Recheck after every draw; yesterday’s keeper may become today’s discard. Read the Table Before Discarding Visible exposures and prior discards provide information. A tile that appears harmless early may become useful to an opponent after an exposure identifies the needed group. There is no perfectly safe discard. As the game advances, prefer tiles already discarded in quantity or tiles less consistent with visible exposures—but…